Tutorial: How to Installing Arch Linux 2016 with more desktop environment (DE)
![]()
Exactly, this article about installing arch linux longstanding between provide on wiki.archlinux or blog.
But my goals here, is for documentation as linux users. Which installed arch linux must be know step by step to installing arch linux.
Arch linux is linux which adopts rolling release, so arch linux will update/upgrade system latest version like Slackware current version.
Okay, first i will explain about installing arch linux. Before installing arch linux you must understand about partition with cli or system requirement.
So first, make sure setup arch linux iso on USB or virtual machine.
and then »>
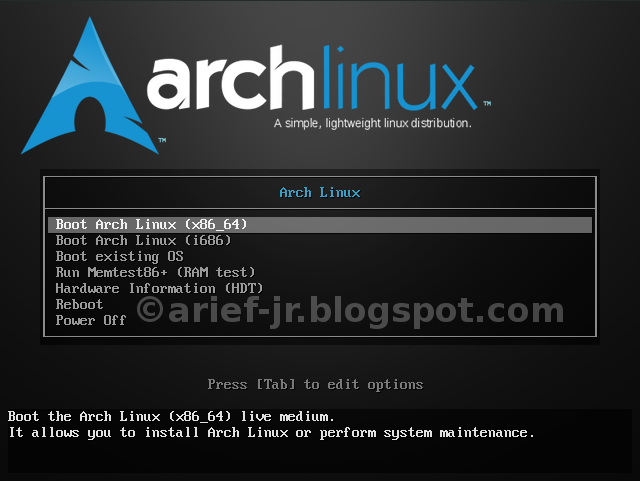
- Choose Arch linux for Arch 64 bit or Arch 32 bit
For installation Arch linux between architecture machine, of course adjusted to the conditions your machine.
Because for installation arch linux need internet connection, can installed offline of course you must have local repository. So i choose install arch linux online. Make sure if connection has available, or card interface enabling.
iwconfig (for see all available interface)
or
ifconfig -a
if available, you must select to install via LAN, wireless or modem broadband
a. Setup internet connection with LAN
# dhcpcd (interface_name such as: enp0s3, eth0)
b. Setup internet connection via Wireless or Wi-Fi
# wifi-menu (interface_name)
c. Setup internet connection via modem broadband
# wvdialconf (when modem plug in)
and edit on /etc/wvdial.conf if modem detected
# nano /etc/wvdial.conf
configure GSM modem
example:
[Dialer Telkomsel]
init1 = ATZ
init2 = ATQ0 V1 E1 S0=0 &C1 &D2+FCLASS=0
init3 = ACGDCONT=1,”IP”,”internet”
Modem Type = Analog Modem
ISDN = 0
Phone = #99
Modem = /dev/ttyUSB0
Username = ‘
Password = ‘
Baud = 9600After setup, don’t forget check with ping
# ping google.com
d. Set keyboard layout
# loadkeys us
e. Set up partition
For setup partition, i using cfdisk for create partition
My type partition like this:
Swap = /dev/sda1
/root = /dev/sda2
/home = /dev/sda3 (residual of root and swap partition)
don’t forget if you using cfdisk as create partition, on swap partition select type and choose to 82 (linux swap) on home and root leave it alone. of course, before exit select to write and type command “yes”.
f. Format partition has created by cfdisk
great running order, surely must format partition like swap, /home and /root. because my experience installing arch linux without format partition the system could not boot like /boot/vmlinuz-xxxx or syslinux not found.
So,
mkswap /dev/sda1
mkfs.ext4 /dev/sda2
mkfs.ext4 /dev/sda3and next step mount our partitions
# mount /dev/sda2 /mnt (only root) because home partition can added to fstab that automount every boot time.
# swapon /dev/sda1 (activate swap)
g. Next step, installing base package
If you have local repo/ mirror you can choose to /etc/pacman.d/mirrorlist that faster, but if not can directly without local mirror and surely have a great internet connection.
and then type command
# pacstrap /mnt base base-devel
# pacman -r /mnt -Sy
install bootloader
# arch-chroot /mnt pacman -S grub-bios
# grub-mkconfig -o /boot/grub/grub.cfg
# grub-install –recheck /dev/sda
generate fstab
# genfstab -p /mnt » /mnt/etc/fstab
log in to chroot
# arch-chroot /mnt
# bashcreate your hostname
# nano /etc/bostname and add desired hostname
Set your timezone, with symlink (symbolic link)
# ln -s /usr/share/zoneinfo/Asia/Jakarta /etc/hostname
configure language
# nano /etc/locale.gen
remove comment (#) on en_US.UTF-8, you can add other language if you want.Then create locale config
# nano /etc/locale.conf
then type:
LANG=”en_US.UTF-8
LC_COLLATE=”C”
LC_TIME=”en_US.UTF-8”generate locale
# locale-gen
config kernel
# mkinitcpio -p linux
h. Set root password
# password (input your password)
i. Umount your partition and reboot
# umount /mnt/
# reboot
j. Next after reboot, log in to arch linux with user “root” and password that you created earlier and turn on your dhcp.
# systemctl start dhcpcd
# systemctl enable dhcpcd
k. Install X-server, VGA, default fonts and other package
# pacman -S xorg-server
install mesa for 3D support
# pacman -S mesa mesa-demos
and check your graphics name
# **lspci grep VGA**
if you use Nvidia graphics, you can type here
# pacman -S nvidia nvidia-utils pangox-compat
# pacman -S xf86-video-nouveau nouveau-dri
if you use Intel graphics
# **pacman -Ss xf86-video less**
install intel video drivers
# pacman -S xf86-video-intel
or install graphics standard, while supported by many intel VGA
# pacman -S xf86-video-vesa
If you want install ATI/AMD graphic
# pacman -S xf86-vedo-ati
For install Driver VGA SIS
# pacman -S xf86-video-sis xf86-video-usb xf86-video-sismedia
install 3D acceleration on 32 bit application for archlinux x86_64
# pacman -S lib32-intel-dri
install input tools
# pacman -S xf86-synaptics xf86-input-evdev
install supported application
# pacman -S dbus gksu polkit-gnome ntfs-3g gnome-keyring gvfs alsa-utils alsa-oss alsa-plugins firefox flashplayer vlc gimp audacious smplayer ttf-droid ttf-ubuntu-font-family ttf-dejavu a52dec faac faad2 flac jasper lame ffmpeg libdca libdv libmad libmpeg2 libtheora libvorbis libxv wavpack x264 Xvidcore gstreamer scrot unzip unrar zip p7zip Wxgtk leafpad pm-utils upower evinve libreoffice usb_modeswitch volumeicon xdg-utils slim modemmanager gnome-icon-theme idesk networkmanager network-manager-applet
l. Adding user and setting sudo user
# useradd -m -g users -G lp,wheel,games,video,audio,optical,storage,scanner,power -s /bin/bash <username>
# password <username>Setting sudo
# nano /etc/sudoers
add this line, to very bottom from sudoers file
username ALL=(ALL) ALL
and then
# reboot
m. DE choice
you can install xfce, kde or kde plasma, gnome, Mate or if you like lightweight DE using dwm, openbox, fluxbox etc.
This sample for installing XFCE desktop
# pacman -S xfce xfce-goodies
setting xinitrc
$ cp /etc/skel/.xinitrc ~/.xinitrc
$ nano ~/.xinitrc
and uncomment this line
# exec startxfce4
setting default login manager with slim
$ sudo systemctl enable slim.service
$ sudo systemctl reboot
Or, if you want install kde-plasma as DE
# pacman -S plasma
# pacman -S sddm (login manager kde-plasma, kde previously using KDM as login manager)
enable and start sddm
# systemctl enable sddm
# systemctl start sddm
make sddm look nice in plasma
# nano /etc/sddm.conf
and your theme should be look like this:
[Theme]
Current=breeze
CursorTheme=breeze_cursors
FacesDir=/usr/share/sddm/faces
ThemeDir=/usr/share/sddm/themes
If you want manage it through system settings then install this package:
# pacman -S sddm-kcm
So these tutorial about “Installing Arch Linux with KDE-plasma and XFCE“.
Next, if i have time i will share to install software or application on arch linux.