Step-by-Step Guide: Installing and Configuring MySQL/MariaDB Master-Slave on Self-Managed Servers
Image by Arief JR
What is MySQL/MariaDB?
MySQL:
MySQL is an open-source relational database management system (RDBMS) developed by Oracle Corporation. It uses Structured Query Language (SQL) to manage and manipulate databases. MySQL is widely used for web applications and is a central component of the LAMP (Linux, Apache, MySQL, PHP/Perl/Python) stack. It is known for its reliability, robustness, and ease of use.
MariaDB:
MariaDB is a community-developed, open-source fork of MySQL, created by the original developers of MySQL after Oracle acquired MySQL AB. MariaDB aims to maintain compatibility with MySQL while improving upon its features and performance. It is fully compatible with MySQL, meaning that applications and tools developed for MySQL generally work seamlessly with MariaDB.
Why Configure Master-Slave Replication?
1. High Availability and Redundancy:
Failover and Recovery: In case the master server fails, a slave can be promoted to become the new master, minimizing downtime. Data Redundancy: Replicating data to one or more slaves ensures that there are multiple copies of the data, protecting against data loss.
2. Load Balancing:
Read-Write Split: With master-slave replication, write operations are performed on the master while read operations can be distributed among multiple slave servers. This reduces the load on the master and improves overall performance. Scalability: By distributing read queries across several slave servers, you can handle more simultaneous read operations, enhancing the scalability of your application.
3. Backup and Maintenance:
Non-Disruptive Backups: Backups can be performed on the slave servers without affecting the performance of the master server. This ensures that the master can continue handling write operations without interruptions. Maintenance Tasks: Maintenance tasks, such as schema changes and indexing, can be tested on the slave before applying them to the master, reducing the risk of downtime or performance issues.
4. Data Analytics and Reporting:
Offload Reporting: Analytical and reporting queries can be directed to the slave servers, preventing heavy read operations from impacting the performance of the master. Data Mining: Data mining operations can be run on the slave servers, ensuring that the master remains responsive for transactional queries.
5. Disaster Recovery:
Geographic Distribution: Slave servers can be located in different geographic regions, providing a disaster recovery solution in case of regional failures or outages. Data Integrity: Continuous replication ensures that the data on the slave is up-to-date, providing an up-to-date backup that can be used to restore the master in case of data corruption or loss.
How Does Master-Slave Replication Work?
In a master-slave replication setup, the master server logs all changes to its databases (insert, update, delete operations) in binary log files. The slave servers read these binary logs and apply the changes to their own databases, ensuring that their data is an exact copy of the master’s data. This process involves several key steps:
1. Binary Logging: The master server writes changes to a binary log file.
2. Log Shipping: The slave server reads the binary log from the master.
3. Relay Log: The slave writes the received binary log events to a relay log.
4. SQL Thread: The slave’s SQL thread reads the relay log and applies the changes to the slave’s databases.
By configuring master-slave replication, you can achieve a robust, scalable, and highly available database infrastructure that meets the demands of modern web applications.
Note: MySQL and MariaDB have identical command and other structure
Setting up a master-slave replication for MariaDB/MySQL on Ubuntu involves several steps. Below is a detailed guide to help you through the process:
Prerequisites
- Two Ubuntu Servers: One for the master and one for the slave. Ensure both are up-to-date.
- MariaDB/MySQL Installed: Make sure MariaDB/MySQL is installed on both servers.
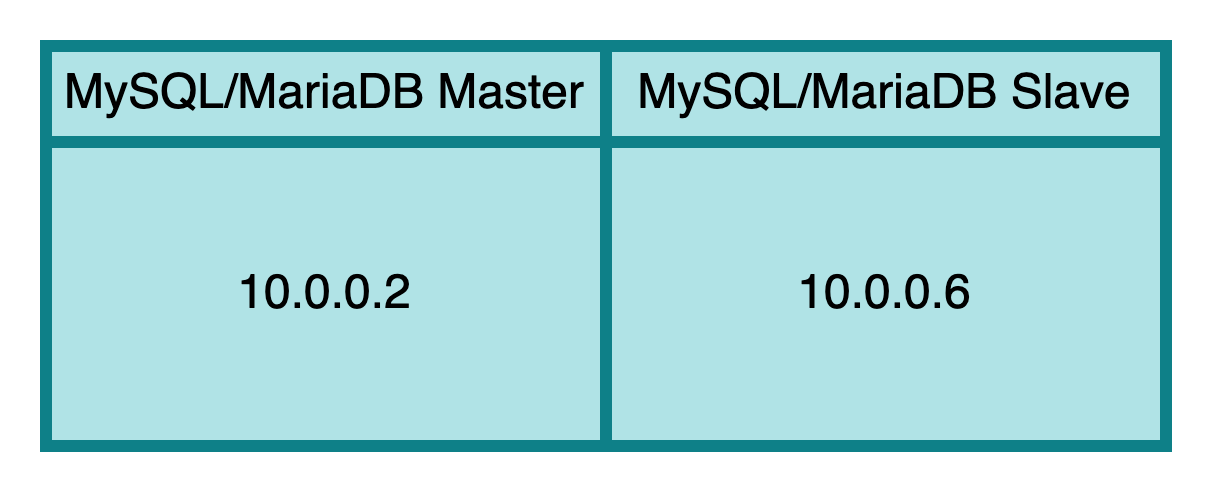
Assume, have 2 ubuntu 22.04 server and allocate this ip address:
Step 1: Install MariaDB/MySQL
Install MariaDB/MySQL on both the master and slave servers.
1
2
sudo apt update -y
sudo apt install mariadb-server -y
or
1
2
sudo apt udpate -y
sudo apt install mysql-server -y
Step 2: Configure the Master Server
- Edit the MySQL Configuration File:
Open the MariaDB/MySQL configuration file on the master server.
Mariadb
1
sudo nano /etc/mysql/mariadb.conf.d/50-server.cnf
MySQL:
1
sudo nano /etc/mysql/conf.d/50-server.cnf
- Add/Modify the Following Lines: Make sure these settings are added/modified in the [mysqld] section:
1
2
3
4
5
6
7
8
9
10
11
12
13
14
15
16
17
18
19
20
[mysqld]
server-id = 1
log_bin = /var/log/mysql/mysql-bin.log
expire_logs_days        = 10
max_binlog_size        = 100M
relay_log		= /var/log/mysql/mysql-relay-bin.log
relay_log_index		= /var/log/mysql/mysql-relay-bin.index
log_error = /var/log/mysql/error.log # Enable this if you want to have error logging into a separate file
slow_query_log_file    = /var/log/mysql/mariadb-slow.log # Enable the slow query log to see queries with especially long duration
long_query_time        = 10
log_slow_verbosity     = query_plan,explain

#Optional, if you want add for tunning performance or character set

character-set-server  = utf8mb4
collation-server      = utf8mb4_general_ci
innodb_buffer_pool_size = 12G #Change this value as your specification machine, in example using 16Gb memory
innodb_log_file_size = 32M #Change your value
max_connections = 700 #Change your value
open_files_limit = 65535 #Change your value
- Restart the MariaDB/MySQL Service:
MariaDB
1
sudo systemctl restart mariadb
MySQL:
1
sudo systemctl restart mysql
- Create a Replication User:
Log into MariaDB and create a user for replication.
1
mysql -u root -p
1
2
3
CREATE USER 'replica_user'@'%' IDENTIFIED BY 'your_password';
GRANT REPLICATION SLAVE ON *.* TO 'replica_user'@'%';
FLUSH PRIVILEGES;
- Lock the Database and Get the Binary Log Coordinates:
1
2
FLUSH TABLES WITH READ LOCK;
SHOW MASTER STATUS;
Note down the File and Position values. You will need these for the slave configuration.
- Export the Database (optional but recommended):
Open a new terminal session and run:
1
mysqldump -u root -p --all-databases --master-data > masterdump.sql
Unlock the tables in the previous session:
1
UNLOCK TABLES;
Step 3: Configure the Slave Server
- Edit the MySQL Configuration File:
MariaDB:
1
sudo nano /etc/mysql/mariadb.conf.d/50-server.cnf
MySQL:
1
sudo nano /etc/mysql/conf.d/50-server.cnf
- Add/Modify the Following Lines:
1
2
3
4
5
6
7
8
9
10
[mysqld]
server-id = 2
expire_logs_days        = 10
max_binlog_size        = 100M
relay_log               = /var/log/mysql/mysql-relay-bin.log
relay_log_index         = /var/log/mysql/mysql-relay-bin.index
log_error = /var/log/mysql/error.log # Enable this if you want to have error logging into a separate file
slow_query_log_file    = /var/log/mysql/mariadb-slow.log # Enable the slow query log to see queries with especially long duration
long_query_time        = 10
log_slow_verbosity     = query_plan,explain
- Restart the MariaDB Service:
MariaDB:
1
sudo systemctl restart mariadb
MySQL:
1
sudo systemctl restart mysql
- Import the Database Dump (if you exported it):
1
mysql -u root -p < masterdump.sql
- Set Up the Slave to Start Replicating:
Log into MariaDB:
1
mysql -u root -p
Stop Slave first:
1
stop slave;
1
2
3
4
5
6
CHANGE MASTER TO
    MASTER_HOST='master_server_ip',  # Replace with Master server IP
    MASTER_USER='replica_user', # Replace with your user
    MASTER_PASSWORD='your_password', # Replace with your password
    MASTER_LOG_FILE='mysql-bin.000001',  # Replace with the File value from SHOW MASTER STATUS
    MASTER_LOG_POS= 123;  # Replace with the Position value from SHOW MASTER STATUS
Start the Slave:
1
START SLAVE;
Check Slave Status:
1
SHOW SLAVE STATUS \G;
Ensure that Slave_IO_Running and Slave_SQL_Running are both set to Yes.
Step 4: Verify Replication
- On the Master Server: Make a change to the database.
1
2
USE your_database_name;
CREATE TABLE test_table (id INT);
- On the Slave Server: Check if the change is replicated.
1
2
USE your_database_name;
SHOW TABLES;
You should see test_table in the list of tables on the slave server.
Tips
- you should add config in slave server with
read_only = onit will be read only on slave not writing or you can useproxysqlto manage your mysql/mariadb database server. - optionally you can enable performance_schema, to enable just add to this config
performance_schema = on. it will usefull for monitoring your execution level on database.
Troubleshooting
If you encounter issues:
- Check the MariaDB/MySQL error logs on both servers
(/var/log/mysql/error.log). - Ensure network connectivity between master and slave.
- Verify that the replication user has the correct permissions.
Following these steps should set up a basic master-slave replication environment for MariaDB/MySQL on Ubuntu.