Install and Configure Mail Server on Ubuntu 22.04 with Postfix, Dovecot and Roundcube: Step-by-Step Complete Guide - Part 1

Image by Arief JR
Setting up and managing your own mail server can have several advantages and disadvantages. Here are some reasons why you might choose to install and configure a self-managed mail server, as well as some potential drawbacks to consider:
Advantages of Self-Managed Mail Server
- Control and Customization:
You have full control over the server configuration, including security settings, email policies, and filtering rules. Customization allows you to tailor the server to meet specific needs or preferences that might not be possible with third-party services.
- Privacy and Security:
Hosting your own mail server ensures that your emails are stored and transmitted through your own infrastructure, which can be more secure than using a third-party service. You can implement advanced security measures such as encryption, spam filtering, and intrusion detection systems.
- Cost Savings:
For organizations with high email volumes, hosting your own server can be more cost-effective in the long run compared to paying for commercial email services. There are no recurring fees based on the number of users or the volume of emails.
- Data Sovereignty:
You maintain complete ownership and control over your data, which is especially important for organizations with strict data sovereignty requirements. Compliance with specific regulatory requirements regarding data storage and transmission can be more easily managed.
- Learning and Experience:
Setting up and managing a mail server can be a valuable learning experience for IT professionals, enhancing their skills in system administration, networking, and security.
Disadvantages of Self-Managed Mail Server
- Complexity and Maintenance:
Setting up a mail server can be complex and time-consuming, requiring a good understanding of networking, server management, and email protocols. Ongoing maintenance is necessary to ensure the server remains secure and functions properly, including software updates, backups, and troubleshooting.
- Security Risks:
Self-managed servers can be targets for attacks such as spam, phishing, and hacking. Proper security measures must be implemented and constantly monitored. Misconfigurations or neglected updates can lead to vulnerabilities.
- Reliability and Uptime:
Ensuring high availability and reliability of your mail server requires redundant infrastructure and careful monitoring, which can be challenging and costly. Downtime can lead to missed emails and disruptions in communication.
- Scalability:
Managing the growth of email traffic and storage needs can be challenging. Commercial services often provide scalable solutions that are easier to manage. Performance tuning and resource management become more critical as the user base grows.
- Support and Compliance:
Lack of professional support can be a drawback, as troubleshooting issues requires in-house expertise. Ensuring compliance with various email standards and regulations can be complex and requires continuous attention.
Update Domain Record
This section should first update your domain record, you can using cloudflare or namecheap as domain record like this example:
Ensure your records existing have the similar hostname of an email server
1
2
Name			Type	Value 		    TTL
example.com.	A	    xx.xxx.xxx.xxx	300
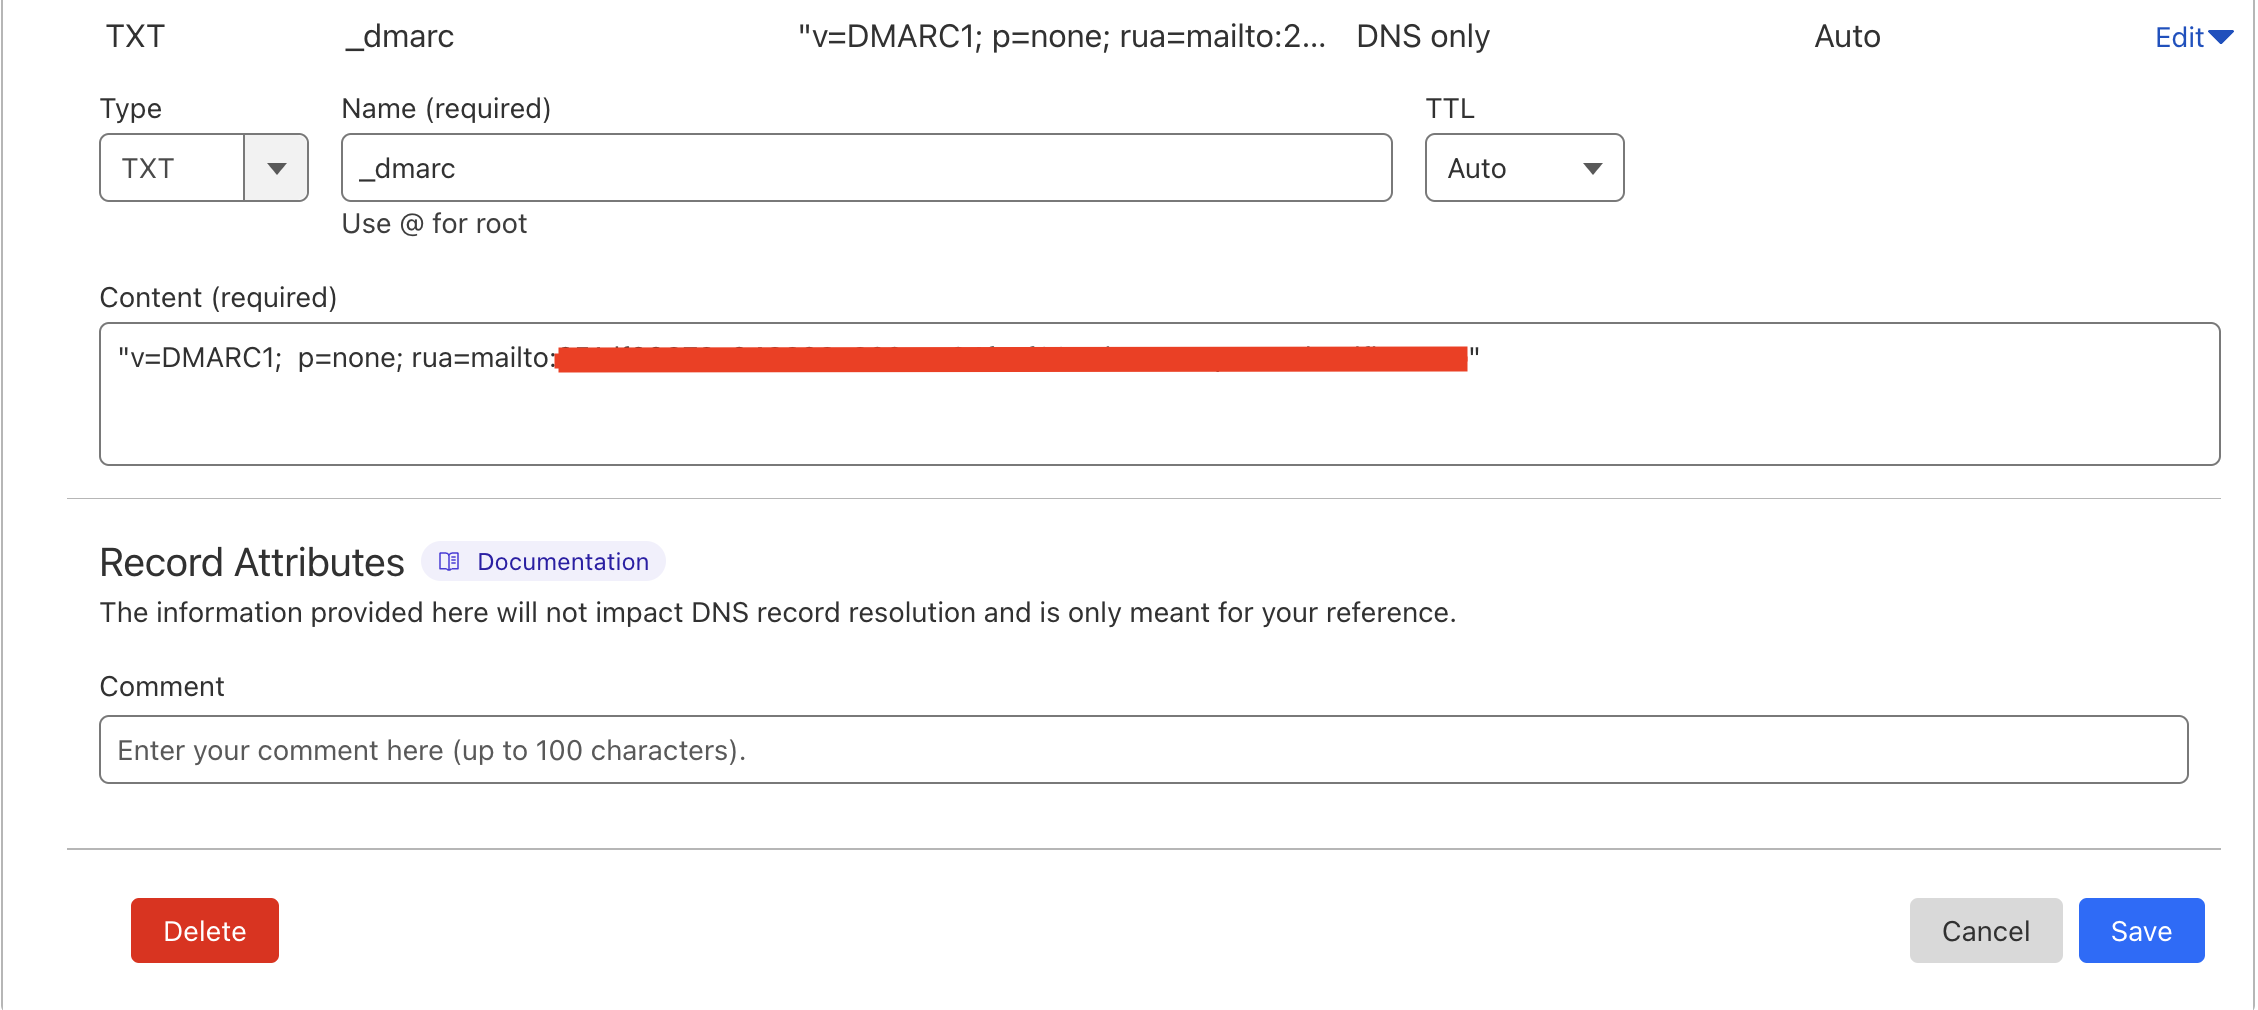
Because in this tutorial will using cloudflare as domain record, so let’s create DMARC and add SPF to at dns record:
- DMARC in Cloudflare
- Log in to the Cloudflare dashboard, and select your account and domain.
- Go to Email > DMARC Management.
- In Email record overview, select View records.
- Use the available options to set up SPF, DKIM, and DMARC records. This page will also list any previous records you might already have in your account.
you will see this record, for example:
- SPF record:
On your cloudflare dashboard add record in spf, like this:
1
2
Name			Type	Value 		                                                        TTL
example.com.	TXT	    v=spf1 ip4:<your mail ip address> include:<your mail domain> -all	300
Configure Hostname
Configure your hostname for email server, the same hostname will be used by postfix and dovecot. Now open your terminal:
- Check hostname
1
hostname
will give output
1
<current hostname>
- Update hostname
1
sudo hostnamectl set-hostname change-hostname.example.com
- And also update at the host file, make sure replace the ip address and hostname using your server ip address and domain.
1
sudo vim /etc/hosts
Update:
1
<your-ip-address> <your-hostname> <your-alias-hostname>
Save and exit with command ctrl + o -» Enter -» crtl + x
Install Postfix
This part is for installation postfix MTA (Mail Transfer Agent), execute this commands in this below to install postfix on ubuntu 22.04
1
2
3
4
5
6
7
8
9
sudo apt update -y
sudo apt install -y php-curl php-gd php-mbstring php-imap php-xml php-apcu

#Additional package
sudo apt install -y zip unzip rar unrar pyzor razor arj cabextract lzop nomarch p7zip-full \
rpm2cpio tnef unzip unrar-free zip bzip2 cpio file gzip pax

#Install postfix (include extension to mysql and policyd spf)
sudo apt install -y postfix postfix-mysql postfix-policyd-spf-python
When installing postfix, will show installer ask and choose the configuration below:
- Figure 1, select to internet site
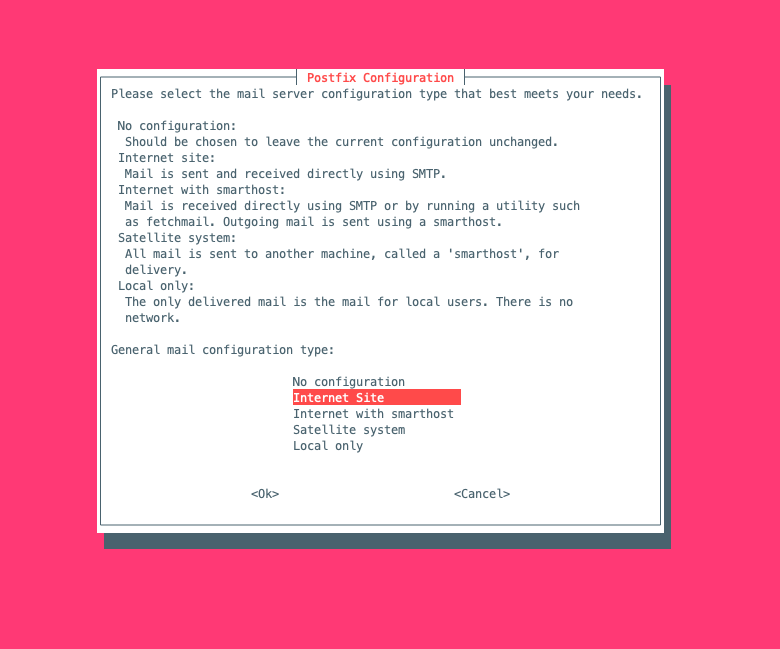
Then press ok
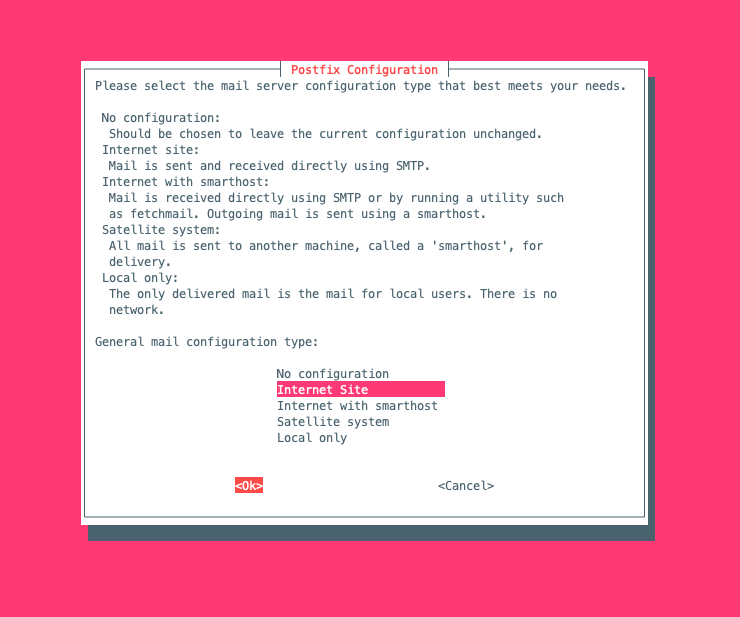
Now type your hostname has setup earlier:

And installation postfix has completed.
Install Dovecot
Execute this command for install dovecot:
1
2
3
4
5
6
7
8
9
10
11
12
13
14
15
16
17
18
19
20
21
22
23
24
25
26
27
28
29
30
31
32
33
34
35
36
37
38
39
40
41
42
43
44
45
46
install -y dovecot-core dovecot-imapd dovecot-pop3d dovecot-lmtpd dovecot-mysql
Reading package lists... Done
Building dependency tree... Done
Reading state information... Done
The following additional packages will be installed:
  libexttextcat-2.0-0 libexttextcat-data
Suggested packages:
  dovecot-gssapi dovecot-ldap dovecot-lucene dovecot-managesieved dovecot-pgsql dovecot-sieve dovecot-solr dovecot-sqlite dovecot-submissiond ntp
The following NEW packages will be installed:
  dovecot-core dovecot-imapd dovecot-lmtpd dovecot-mysql dovecot-pop3d libexttextcat-2.0-0 libexttextcat-data
0 upgraded, 7 newly installed, 0 to remove and 0 not upgraded.
Need to get 3786 kB of archives.
After this operation, 12.2 MB of additional disk space will be used.
Get:1 http://archive.ubuntu.com/ubuntu jammy/main amd64 libexttextcat-data all 3.4.5-1build2 [179 kB]
Get:2 http://archive.ubuntu.com/ubuntu jammy/main amd64 libexttextcat-2.0-0 amd64 3.4.5-1build2 [13.7 kB]
Get:3 http://archive.ubuntu.com/ubuntu jammy-updates/main amd64 dovecot-core amd64 1:2.3.16+dfsg1-3ubuntu2.2 [3319 kB]
Get:4 http://archive.ubuntu.com/ubuntu jammy-updates/main amd64 dovecot-imapd amd64 1:2.3.16+dfsg1-3ubuntu2.2 [193 kB]
Get:5 http://archive.ubuntu.com/ubuntu jammy-updates/universe amd64 dovecot-lmtpd amd64 1:2.3.16+dfsg1-3ubuntu2.2 [29.4 kB]
Get:6 http://archive.ubuntu.com/ubuntu jammy-updates/universe amd64 dovecot-mysql amd64 1:2.3.16+dfsg1-3ubuntu2.2 [13.9 kB]
Get:7 http://archive.ubuntu.com/ubuntu jammy-updates/main amd64 dovecot-pop3d amd64 1:2.3.16+dfsg1-3ubuntu2.2 [37.7 kB]
Fetched 3786 kB in 2s (1804 kB/s)
Selecting previously unselected package libexttextcat-data.
(Reading database ... 95621 files and directories currently installed.)
Preparing to unpack .../0-libexttextcat-data_3.4.5-1build2_all.deb ...
Unpacking libexttextcat-data (3.4.5-1build2) ...
Selecting previously unselected package libexttextcat-2.0-0:amd64.
Preparing to unpack .../1-libexttextcat-2.0-0_3.4.5-1build2_amd64.deb ...
Unpacking libexttextcat-2.0-0:amd64 (3.4.5-1build2) ...
Selecting previously unselected package dovecot-core.
Preparing to unpack .../2-dovecot-core_1%3a2.3.16+dfsg1-3ubuntu2.2_amd64.deb ...
Unpacking dovecot-core (1:2.3.16+dfsg1-3ubuntu2.2) ...
Selecting previously unselected package dovecot-imapd.
Preparing to unpack .../3-dovecot-imapd_1%3a2.3.16+dfsg1-3ubuntu2.2_amd64.deb ...
Unpacking dovecot-imapd (1:2.3.16+dfsg1-3ubuntu2.2) ...
Selecting previously unselected package dovecot-lmtpd.
Preparing to unpack .../4-dovecot-lmtpd_1%3a2.3.16+dfsg1-3ubuntu2.2_amd64.deb ...
Unpacking dovecot-lmtpd (1:2.3.16+dfsg1-3ubuntu2.2) ...
Selecting previously unselected package dovecot-mysql.
Preparing to unpack .../5-dovecot-mysql_1%3a2.3.16+dfsg1-3ubuntu2.2_amd64.deb ...
Unpacking dovecot-mysql (1:2.3.16+dfsg1-3ubuntu2.2) ...
Selecting previously unselected package dovecot-pop3d.
Preparing to unpack .../6-dovecot-pop3d_1%3a2.3.16+dfsg1-3ubuntu2.2_amd64.deb ...
Unpacking dovecot-pop3d (1:2.3.16+dfsg1-3ubuntu2.2) ...
Setting up libexttextcat-data (3.4.5-1build2) ...
Setting up libexttextcat-2.0-0:amd64 (3.4.5-1build2) ...
Setting up dovecot-core (1:2.3.16+dfsg1-3ubuntu2.2) ...
Install MariaDB
If your server not installed mariadb, you should install first. Because the mail data like users, password will store to MariaDB. Execute this command:
1
sudo apt install -y mariadb-client mariadb-server
Install Postgrey, Clamav, Amavis and SpamAssassin
To secure the mail server need a several dependencies, execute this command:
1
2
3
4
5
6
7
8
9
10
11
12
13
14
# Install Postgrey
sudo apt install -y postgrey

# Install Clam
sudo apt install -y clamav clamav-daemon

# Install Amavis
sudo apt install -y amavis

# Install SpamAssassin
sudo apt install -y spamassassin

# Install additional packages
sudo apt install -y libdbi-perl libdbd-mysql-perl
Install OpenDKIM
OpenDKIM is an open source implementation of the DKIM (Domain Keys Identified Mail) sender authentication system proposed by the E-mail Signing Technology Group (ESTG), now standardized by the IETF RFC6376. So that the other email servers can authenticate the emails sent from our server and confirm that the emails are not forged or altered and the emails are authorized by the domain owner, execute this command:
1
sudo apt install -y opendkim opendkim-tools
Configure Database - MariaDB
After installed mariadb, you should configure first. you can read in this article earlier here,
Configure Postfix
Now configure this postfix, follow this configurations below:
- Backup config first:
1
2
sudo cp /etc/postfix/main.cf /etc/postfix/main.cf.orig
sudo cp /etc/postfix/master.cf /etc/postfix/master.cf.orig
- Create virtualhost email directory
1
2
3
4
5
6
7
8
9
10
11
12
13
14
15
16
17
18
19
20
21
22
23
24
25
26
27
28
# Mails Directory
sudo mkdir -p /<path to vmail>/vmail/

# Create mail group and user
sudo groupadd -g 5000 vmail
sudo useradd -g vmail -u 5000 vmail -d /<path to vmail>/vmail

# Change mails directory owner
sudo chmod 770 /<path to vmail>/vmail
sudo chown -R vmail:vmail /<path to vmail>/vmail

# Check permissions
ls -ld /<path to vmail>/vmail

# Output
drwxrwx--- 2 vmail vmail 4096 Jul 1 21:30 /<path to vmail>/vmail

# Check UID
id -u vmail

# Output
5000

# Check GID
id -g vmail

# Output
5000
- Create header and content checks
1
2
# Create Header Checks
sudo vim /etc/postfix/header_checks
put this file with this content:
1
2
3
4
5
6
7
# Content
/^Received:/ IGNORE
/^User-Agent:/ IGNORE
/^X-Mailer:/ IGNORE
/^X-Originating-IP:/ IGNORE
/^x-cr-[a-z]*:/ IGNORE
/^Thread-Index:/ IGNORE
save and exit, with vim editor to save and exist press esc + :wq
1
2
# MIME header checks
sudo vim /etc/postfix/mime_header_checks
fill this file in the below:
1
2
# Content
/name=[^>]*\.(bat|com|exe|dll)/ REJECT
1
2
3
4
# Body Checks
sudo vim /etc/postfix/body_checks

# Just add an empty line for now
1
2
3
4
# Client Checks
sudo vim /etc/postfix/client_checks

# Just add an empty line for now
1
2
3
4
# Sender Checks
sudo vim /etc/postfix/sender_checks

# Just add an empty line for now
- jump first this section to database, because this email will using database. After configured, create database and user with this command:
1
2
3
4
5
6
7
8
9
10
11
MariaDB [(none)]> CREATE DATABASE <your-database-name> CHARACTER SET utf8mb4 COLLATE utf8mb4_general_ci;
Query OK, 1 row affected (0.001 sec)

MariaDB [(none)]> CREATE USER '<your-user>'@'localhost' IDENTIFIED WITH mysql_native_password BY '<your-password>';
Query OK, 0 rows affected (0.002 sec)

MariaDB [(none)]> GRANT ALL PRIVILEGES ON <your-database-name>.* TO '<your-user>'@'localhost';
Query OK, 0 rows affected (0.001 sec)

MariaDB [(none)]> FLUSH PRIVILEGES;
Query OK, 0 rows affected (0.001 sec)
in above command use authentication plugin mysql_native_password, because sha256_password and caching_sha2_password does not currently support with mariadb. Here this article
- Create and configure virtual domain
1
2
# Virtual domains
sudo vim /etc/postfix/mysql_virtual_mailbox_domains.cf
fill with this config:
1
2
3
4
5
6
# Content
hosts = 127.0.0.1
user = <your-user-mail>
password = <your-password>
dbname = <your-database>
query = SELECT domain FROM domain WHERE domain='%s' and backupmx = 0 and active = 1
1
2
# Email addresses
sudo vim /etc/postfix/mysql_virtual_mailbox_maps.cf
fill with this config:
1
2
3
4
5
6
# Content
hosts = 127.0.0.1
user = <your-user-mail>
password = <your-password>
dbname = <your-database>
query = SELECT goto FROM alias WHERE address='%s' AND active = 1
1
2
# Aliases
sudo vim /etc/postfix/mysql_virtual_alias_maps.cf
fill with this config:
1
2
3
4
5
6
# Content
hosts = 127.0.0.1
user = <your-user-mail>
password = <your-password>
dbname = <your-database>
query = SELECT goto FROM alias WHERE address='%s' AND active = 1
1
2
# Relays
sudo vim /etc/postfix/mysql_relay_domains.cf
fill with this config:
1
2
3
4
5
6
# Content
hosts = 127.0.0.1
user = <your-user-mail>
password = <your-password>
dbname = <your-database>
query = SELECT domain FROM domain WHERE domain='%s' and backupmx = 1
- Configure postfix main, execute this command:
1
sudo vim /etc/postfix/main.cf
Insert this config:
1
2
3
4
5
6
7
8
9
10
11
12
13
14
15
16
17
18
19
20
21
22
23
24
25
26
27
28
29
30
31
32
33
34
35
36
37
38
39
40
41
42
43
44
45
46
47
48
49
50
51
52
53
54
55
56
57
58
59
60
61
62
63
64
65
66
67
68
69
70
71
72
73
74
75
76
77
78
79
80
81
82
83
84
85
86
87
88
89
90
91
92
93
94
95
96
97
98
99
100
101
102
103
104
105
106
107
108
109
110
111
112
113
114
115
116
117
118
119
120
121
122
123
124
125
126
127
128
129
130
131
132
133
smtpd_banner = $myhostname ESMTP $mail_name (Ubuntu)
biff = no
append_dot_mydomain = no
#delay_warning_time = 4h
readme_directory = no
compatibility_level = 2

# SASL parameters
# -----------------------
smtpd_sasl_type = dovecot
smtpd_sasl_path = private/auth
smtpd_sasl_auth_enable = yes
broken_sasl_auth_clients = yes
smtpd_sasl_security_options = noanonymous, noplaintext
smtpd_sasl_local_domain =
smtpd_sasl_authenticated_header = yes

# TLS parameters
# -----------------------
smtpd_tls_cert_file=/etc/letsencrypt/live/mail.example.com/fullchain.pem
smtpd_tls_key_file=/etc/letsencrypt/live/mail.example.com/privkey.pem
smtpd_tls_CAfile=/etc/letsencrypt/live/mail.example.com/chain.pem
smtpd_use_tls=yes
smtpd_tls_security_level = may
#smtpd_tls_session_cache_database = btree:${data_directory}/smtpd_scache
smtpd_tls_auth_only = yes
smtpd_sasl_tls_security_options = noanonymous
smtpd_tls_loglevel = 1
smtpd_tls_received_header = yes
smtpd_tls_session_cache_timeout = 3600s
smtpd_tls_protocols = !SSLv2, !SSLv3
smtpd_tls_ciphers = high
#smtp_tls_CApath=/etc/ssl/certs
smtp_use_tls=yes
smtp_tls_security_level = may
#smtp_tls_session_cache_database = btree:${data_directory}/smtp_scache
smtp_tls_note_starttls_offer = yes
tls_random_source = dev:/dev/urandom

# SMTPD parameters
# -----------------------
unknown_local_recipient_reject_code = 450
maximal_queue_lifetime = 7d
minimal_backoff_time = 1000s
maximal_backoff_time = 8000s
smtp_helo_timeout = 60s
smtpd_recipient_limit = 25
smtpd_error_sleep_time = 1s
smtpd_soft_error_limit = 3
smtpd_hard_error_limit = 12
smtpd_delay_reject = yes
disable_vrfy_command = yes

# HELO Restrictions - Reject - HELO/EHLO information
smtpd_helo_required = yes
smtpd_helo_restrictions = permit_mynetworks, warn_if_reject reject_non_fqdn_hostname, reject_invalid_hostname, permit

# Sender Restrictions - Reject - MAIL FROM
smtpd_sender_restrictions = permit_mynetworks, permit_sasl_authenticated, check_sender_access hash:/etc/postfix/sender_checks, warn_if_reject reject_non_fqdn_sender, reject_authenticated_sender_login_mismatch, reject_unknown_sender_domain, reject_unauth_pipelining, permit

# Client Restrictions - Connecting server - Reject client host
#smtpd_client_restrictions = reject_rbl_client relays.ordb.org, reject_rbl_client blackholes.easynet.nl, reject_rbl_client cbl.abuseat.org, reject_rbl_client proxies.blackholes.wirehub.net, reject_rbl_client bl.spamcop.net, reject_rbl_client sbl.spamhaus.org, reject_rbl_client opm.blitzed.org, reject_rbl_client dnsbl.njabl.org, reject_rbl_client list.dsbl.org, reject_rbl_client multihop.dsbl.org, permit

smtpd_client_restrictions = check_client_access hash:/etc/postfix/client_checks, reject_rbl_client sbl.spamhaus.org, reject_rbl_client blackholes.easynet.nl, reject_rbl_client dnsbl.njabl.org

# Recipient Restrictions - Reject - RCPT TO
smtpd_recipient_restrictions = permit_mynetworks, permit_sasl_authenticated, reject_non_fqdn_hostname, reject_non_fqdn_sender, reject_non_fqdn_recipient, reject_unknown_recipient_domain, reject_unauth_destination, reject_unauth_pipelining, reject_invalid_hostname, check_policy_service unix:private/policy-spf, check_policy_service inet:127.0.0.1:10023, permit

# Reject - DATA
smtpd_data_restrictions = reject_unauth_pipelining

# Relay Restrictions - Reject - RCPT TO
smtpd_relay_restrictions = permit_mynetworks, reject_unauth_pipelining, permit_sasl_authenticated, reject_non_fqdn_recipient, reject_unknown_recipient_domain, reject_unauth_destination, check_policy_service unix:private/policy-spf, check_policy_service inet:127.0.0.1:10023, permit

# General parameters
# -----------------------
myhostname = mail.example.com
alias_maps = hash:/etc/aliases
alias_database = hash:/etc/aliases
mydomain = mail.example.com
myorigin = /etc/mailname
#mydestination = $myhostname, mail.example.com, localhost.example.com, , localhost
mydestination = localhost.$mydomain, , localhost
relayhost =
mynetworks = 127.0.0.0/8 [::ffff:127.0.0.0]/104 [::1]/128
mailbox_size_limit = 0
recipient_delimiter = +
inet_interfaces = all
inet_protocols = all
mynetworks_style = host
message_size_limit = 10240000

# Dovecot
# -----------------------
virtual_transport = lmtp:unix:private/dovecot-lmtp

# Virtual Mailbox
# -----------------------
virtual_uid_maps = static:5000
virtual_gid_maps = static:5000
virtual_mailbox_base = /<path to vmail>/vmail
virtual_mailbox_domains = mysql:/etc/postfix/mysql_virtual_mailbox_domains.cf
virtual_mailbox_maps = mysql:/etc/postfix/mysql_virtual_mailbox_maps.cf
virtual_alias_maps = mysql:/etc/postfix/mysql_virtual_alias_maps.cf
relay_domains = mysql:/etc/postfix/mysql_relay_domains.cf

queue_directory = /var/spool/postfix

# Header Checks
# -----------------------
header_checks = regexp:/etc/postfix/header_checks
mime_header_checks = regexp:/etc/postfix/mime_header_checks

# x-original-to
# -----------------------
enable_original_recipient = no

# Content Checks
# -----------------------
body_checks = regexp:/etc/postfix/body_checks

# Amavis
# -----------------------
content_filter = smtp-amavis:[127.0.0.1]:10024
#content_filter = amavis:[127.0.0.1]:10024
receive_override_options = no_address_mappings

# DKIM
# -----------------------
milter_protocol = 6
milter_default_action = accept
smtpd_milters = inet:localhost:8891
non_smtpd_milters = inet:localhost:8891
- Configure postfix master
1
sudo vim /etc/postfix/master.cf
Insert this config:
1
2
3
4
5
6
7
8
9
10
11
12
13
14
15
16
17
18
19
20
21
22
23
24
25
26
27
28
29
30
31
32
33
34
35
36
37
38
39
40
41
42
43
44
45
46
47
48
49
50
51
52
53
54
55
56
57
58
59
60
61
62
63
64
65
66
67
68
69
70
71
72
73
74
75
76
77
78
79
80
81
82
83
84
85
86
87
88
89
90
91
92
93
94
95
96
97
98
99
100
101
102
103
104
105
106
107
108
109
110
111
112
113
114
115
116
117
118
119
120
121
122
123
124
125
126
127
128
129
130
131
132
133
134
135
136
137
138
139
140
141
142
143
144
145
146
147
148
149
150
151
152
153
154
155
156
157
158
159
160
161
162
163
164
165
166
167
168
169
170
171
172
173
174
175
176
177
178
179
180
181
182
183
184
185
186
187
188
189
190
191
#
# Postfix master process configuration file.  For details on the format
# of the file, see the master(5) manual page (command: "man 5 master" or
# on-line: http://www.postfix.org/master.5.html).
#
# Do not forget to execute "postfix reload" after editing this file.
#
# ==========================================================================
# service type  private unpriv  chroot  wakeup  maxproc command + args
#               (yes)   (yes)   (no)    (never) (100)
# ==========================================================================
smtp      inet  n       -       y       -       -       smtpd
#smtp      inet  n       -       y       -       1       postscreen
#smtpd     pass  -       -       y       -       -       smtpd
#dnsblog   unix  -       -       y       -       0       dnsblog
#tlsproxy  unix  -       -       y       -       0       tlsproxy
#submission inet n       -       y       -       -       smtpd
#  -o syslog_name=postfix/submission
#  -o smtpd_tls_security_level=encrypt
#  -o smtpd_sasl_auth_enable=yes
#  -o smtpd_tls_auth_only=yes
#  -o smtpd_reject_unlisted_recipient=no
#  -o smtpd_client_restrictions=$mua_client_restrictions
#  -o smtpd_helo_restrictions=$mua_helo_restrictions
#  -o smtpd_sender_restrictions=$mua_sender_restrictions
#  -o smtpd_recipient_restrictions=
#  -o smtpd_relay_restrictions=permit_sasl_authenticated,reject
#  -o milter_macro_daemon_name=ORIGINATING
#smtps     inet  n       -       y       -       -       smtpd
#  -o syslog_name=postfix/smtps
#  -o smtpd_tls_wrappermode=yes
#  -o smtpd_sasl_auth_enable=yes
#  -o smtpd_reject_unlisted_recipient=no
#  -o smtpd_client_restrictions=$mua_client_restrictions
#  -o smtpd_helo_restrictions=$mua_helo_restrictions
#  -o smtpd_sender_restrictions=$mua_sender_restrictions
#  -o smtpd_recipient_restrictions=
#  -o smtpd_relay_restrictions=permit_sasl_authenticated,reject
#  -o milter_macro_daemon_name=ORIGINATING

# SMTP with TLS on port 587
submission inet n - - - - smtpd
  -o syslog_name=postfix/submission
  -o smtpd_tls_security_level=encrypt
  -o smtpd_sasl_auth_enable=yes
  -o smtpd_sasl_type=dovecot
  -o smtpd_tls_auth_only=yes
  -o smtpd_client_restrictions=permit_sasl_authenticated,reject_unauth_destination,reject
  -o smtpd_sasl_tls_security_options=noanonymous
  -o milter_macro_daemon_name=ORIGINATING

# SMTP over SSL on port 465
smtps inet n - - - - smtpd
  -o syslog_name=postfix/smtps
  -o smtpd_tls_wrappermode=yes
  -o smtpd_sasl_auth_enable=yes
  -o smtpd_tls_auth_only=yes
  -o smtpd_client_restrictions=permit_sasl_authenticated,reject_unauth_destination,reject
  -o smtpd_sasl_security_options=noanonymous,noplaintext
  -o smtpd_sasl_tls_security_options=noanonymous
  -o milter_macro_daemon_name=ORIGINATING

#628       inet  n       -       y       -       -       qmqpd
#pickup    unix  n       -       y       60      1       pickup
pickup fifo n - - 60 1 pickup
  -o content_filter=
  -o receive_override_options=no_header_body_checks
cleanup   unix  n       -       y       -       0       cleanup
qmgr      unix  n       -       n       300     1       qmgr
#qmgr     unix  n       -       n       300     1       oqmgr
tlsmgr    unix  -       -       y       1000?   1       tlsmgr
rewrite   unix  -       -       y       -       -       trivial-rewrite
bounce    unix  -       -       y       -       0       bounce
defer     unix  -       -       y       -       0       bounce
trace     unix  -       -       y       -       0       bounce
verify    unix  -       -       y       -       1       verify
flush     unix  n       -       y       1000?   0       flush
proxymap  unix  -       -       n       -       -       proxymap
proxywrite unix -       -       n       -       1       proxymap
smtp      unix  -       -       y       -       -       smtp
relay     unix  -       -       y       -       -       smtp
        -o syslog_name=postfix/$service_name
#       -o smtp_helo_timeout=5 -o smtp_connect_timeout=5
showq     unix  n       -       y       -       -       showq
error     unix  -       -       y       -       -       error
retry     unix  -       -       y       -       -       error
discard   unix  -       -       y       -       -       discard
local     unix  -       n       n       -       -       local
virtual   unix  -       n       n       -       -       virtual
lmtp      unix  -       -       y       -       -       lmtp
anvil     unix  -       -       y       -       1       anvil
scache    unix  -       -       y       -       1       scache
postlog   unix-dgram n  -       n       -       1       postlogd
#
# ====================================================================
# Interfaces to non-Postfix software. Be sure to examine the manual
# pages of the non-Postfix software to find out what options it wants.
#
# Many of the following services use the Postfix pipe(8) delivery
# agent.  See the pipe(8) man page for information about ${recipient}
# and other message envelope options.
# ====================================================================
#
# maildrop. See the Postfix MAILDROP_README file for details.
# Also specify in main.cf: maildrop_destination_recipient_limit=1
#
maildrop  unix  -       n       n       -       -       pipe
  flags=DRhu user=vmail argv=/usr/bin/maildrop -d ${recipient}
#
# ====================================================================
#
# Recent Cyrus versions can use the existing "lmtp" master.cf entry.
#
# Specify in cyrus.conf:
#   lmtp    cmd="lmtpd -a" listen="localhost:lmtp" proto=tcp4
#
# Specify in main.cf one or more of the following:
#  mailbox_transport = lmtp:inet:localhost
#  virtual_transport = lmtp:inet:localhost
#
# ====================================================================
#
# Cyrus 2.1.5 (Amos Gouaux)
# Also specify in main.cf: cyrus_destination_recipient_limit=1
#
#cyrus     unix  -       n       n       -       -       pipe
#  user=cyrus argv=/cyrus/bin/deliver -e -r ${sender} -m ${extension} ${user}
#
# ====================================================================
# Old example of delivery via Cyrus.
#
#old-cyrus unix  -       n       n       -       -       pipe
#  flags=R user=cyrus argv=/cyrus/bin/deliver -e -m ${extension} ${user}
#
# ====================================================================
#
# See the Postfix UUCP_README file for configuration details.
#
uucp      unix  -       n       n       -       -       pipe
  flags=Fqhu user=uucp argv=uux -r -n -z -a$sender - $nexthop!rmail ($recipient)
#
# Other external delivery methods.
#
ifmail    unix  -       n       n       -       -       pipe
  flags=F user=ftn argv=/usr/lib/ifmail/ifmail -r $nexthop ($recipient)
bsmtp     unix  -       n       n       -       -       pipe
  flags=Fq. user=bsmtp argv=/usr/lib/bsmtp/bsmtp -t$nexthop -f$sender $recipient
scalemail-backend unix	-	n	n	-	2	pipe
  flags=R user=scalemail argv=/usr/lib/scalemail/bin/scalemail-store ${nexthop} ${user} ${extension}
mailman   unix  -       n       n       -       -       pipe
  flags=FR user=list argv=/usr/lib/mailman/bin/postfix-to-mailman.py
  ${nexthop} ${user}

# Amavis
smtp-amavis unix - - - - 2 smtp
  -o smtp_data_done_timeout=1200
  -o smtp_send_xforward_command=yes
  -o disable_dns_lookups=yes
  -o max_use=20

127.0.0.1:10025 inet n - - - - smtpd
  -o content_filter=
  -o local_recipient_maps=
  -o relay_recipient_maps=
  -o smtpd_restriction_classes=
  -o smtpd_delay_reject=no
  -o smtpd_client_restrictions=permit_mynetworks,reject
  -o smtpd_helo_restrictions=
  -o smtpd_sender_restrictions=
  -o smtpd_recipient_restrictions=permit_mynetworks,reject
  -o smtpd_data_restrictions=reject_unauth_pipelining
  -o smtpd_end_of_data_restrictions=
  -o mynetworks=127.0.0.0/8
  -o smtpd_error_sleep_time=0
  -o smtpd_soft_error_limit=1001
  -o smtpd_hard_error_limit=1000
  -o smtpd_client_connection_count_limit=0
  -o smtpd_client_connection_rate_limit=0
  -o receive_override_options=no_header_body_checks,no_unknown_recipient_checks,no_milters

# Dovecot
dovecot unix - n n - - pipe
	flags=DRhu user=vmail:mail argv=/usr/lib/dovecot/dovecot-lda -d $(recipient)

# SPF
policy-spf  unix  -       n       n       -       -       spawn
     user=nobody argv=/usr/bin/policyd-spf

# SpamAssassin
spamassassin unix -     n       n       -       -       pipe
    flags=DROhu user=vmail:vmail argv=/usr/bin/spamc -f -e /usr/sbin/sendmail -oi -f ${sender} ${recipient}
Configure Dovecot
This section provides the configurations specific to Dovecot. Change the ownership of the dovecot installation as shown below.
1
2
sudo chown -R vmail:dovecot /etc/dovecot
sudo chmod -R o-rwx /etc/dovecot
Now backup the configuration files as shown below.
1
2
3
4
5
6
7
8
9
10
11
sudo cp /etc/dovecot/dovecot.conf /etc/dovecot/dovecot.conf.orig
sudo cp /etc/dovecot/dovecot-sql.conf.ext /etc/dovecot/dovecot-sql.conf.ext.orig
sudo cp /etc/dovecot/conf.d/10-auth.conf /etc/dovecot/conf.d/10-auth.conf.orig
sudo cp /etc/dovecot/conf.d/10-mail.conf /etc/dovecot/conf.d/10-mail.conf.orig
sudo cp /etc/dovecot/conf.d/10-master.conf /etc/dovecot/conf.d/10-master.conf.orig
sudo cp /etc/dovecot/conf.d/10-ssl.conf /etc/dovecot/conf.d/10-ssl.conf.orig
sudo cp /etc/dovecot/conf.d/15-lda.conf /etc/dovecot/conf.d/15-lda.conf.orig
sudo cp /etc/dovecot/conf.d/auth-sql.conf.ext /etc/dovecot/conf.d/auth-sql.conf.orig
sudo cp /etc/dovecot/conf.d/15-mailboxes.conf /etc/dovecot/conf.d/15-mailboxes.conf.orig
sudo cp /etc/dovecot/conf.d/20-lmtp.conf /etc/dovecot/conf.d/20-lmtp.conf.orig
sudo cp /etc/dovecot/conf.d/90-plugin.conf /etc/dovecot/conf.d/90-plugin.conf.orig
Now we will configure the files as listed above.
Main Configuration - Update the main configuration file of Dovecot as shown below.
1
2
# Main Configuration
sudo vim /etc/dovecot/dovecot.conf
1
2
3
4
5
6
7
8
# Updates
-----
# Enable installed protocols
!include_try /usr/share/dovecot/protocols.d/*.protocol
protocols = imap pop3 lmtp
-----

# Save and exit the editor
Mail Configuration - Update the mail configuration and specify the mails directory.
1
2
# Mail Configuration
sudo vim /etc/dovecot/conf.d/10-mail.conf
1
2
3
4
5
6
7
8
9
10
11
12
13
14
15
16
# Updates
-----
#mail_location = mbox:~/mail:INBOX=/var/mail/%u
mail_location = maildir:/<path to vmail>/vmail/%d/%n
-----
mail_uid = vmail
mail_gid = vmail
-----
#mail_privileged_group = mail
mail_privileged_group = vmail
-----
first_valid_uid = 5000
last_valid_uid = 5000
-----

# Save and exit the editor
Auth Configuration - Update the auth configuration.
1
2
# Auth Configuration
sudo vim /etc/dovecot/conf.d/10-auth.conf
1
2
3
4
5
6
7
8
9
10
11
# Updates
-----
disable_plaintext_auth = yes
auth_mechanisms = plain login
-----
#!include auth-system.conf.ext
!include auth-sql.conf.ext
#!include auth-ldap.conf.ext
-----

# Save and exit the editor
SQL Auth Configuration - Update the auth configuration.
1
2
# Mail Configuration
sudo vim /etc/dovecot/conf.d/auth-sql.conf.ext
1
2
3
4
5
6
7
8
9
10
11
12
13
# Updates
-----
#userdb {
#  driver = sql
#  args = /etc/dovecot/dovecot-sql.conf.ext
#}
-----
userdb {
  driver = static
  args = uid=vmail gid=vmail home=/<path to vmail>/vmail/%d/%n
}

# Save and exit the editor
DB Configuration - Update the database configuration.
1
2
# Mail Configuration
sudo vim /etc/dovecot/dovecot-sql.conf.ext
1
2
3
4
5
6
7
8
9
10
11
12
13
14
15
# Updates
-----
driver = mysql
-----
connect = host=localhost dbname=mail user=mail password=dbpassword
-----
default_pass_scheme = SHA512-CRYPT
-----
password_query = \
SELECT username as user, password, '/<path to vmail>/vmail/%d/%n' as userdb_home, \
'maildir:/<path to vmail>/vmail/%d/%n' as userdb_mail, 5000 as userdb_uid, 5000 as userdb_gid \
FROM mailbox WHERE username = '%u' AND active = '1'
-----

# Save and exit the editor
Master Configuration - Update the master configuration.
1
2
# Master Configuration
sudo vim /etc/dovecot/conf.d/10-master.conf
1
2
3
4
5
6
7
8
9
10
11
12
13
14
15
16
17
18
19
20
21
22
23
24
25
26
27
28
29
30
31
32
33
34
35
36
37
38
39
40
41
42
43
44
45
46
47
48
49
50
51
52
53
54
55
56
57
58
59
60
# Updates
-----
service imap-login {
  inet_listener imap {
    port = 143
  }
  inet_listener imaps {
    port = 993
    ssl = yes
  }
-----
service pop3-login {
  inet_listener pop3 {
    port = 110
  }
  inet_listener pop3s {
    port = 995
    ssl = yes
  }

service submission-login {
  inet_listener submission {
    port = 587
  }
}

service lmtp {
  unix_listener /var/spool/postfix/private/dovecot-lmtp {
    mode = 0600
    user = postfix
    group = postfix
  }
-----
service auth {
-----
  unix_listener auth-userdb {
    mode = 0600
    user = vmail
    group = vmail
  }

  # Postfix smtp-auth
  unix_listener /var/spool/postfix/private/auth {
    mode = 0666
    user = postfix
    group = postfix
  }

  # Auth process is run as this user.
  user = dovecot
-----
service auth-worker {
  # Auth worker process is run as root by default, so that it can access
  # /etc/shadow. If this isn't necessary, the user should be changed to
  # $default_internal_user.
  user = vmail
}
-----

# Save and exit the editor
SSL Configuration - Update the SSL configuration.
1
2
# SSL Configuration
sudo vim /etc/dovecot/conf.d/10-ssl.conf
1
2
3
4
5
6
7
8
9
10
11
12
13
14
15
16
17
18
19
20
# Updates
-----
ssl = yes
-----
#ssl_cert = </etc/dovecot/private/dovecot.pem
#ssl_key = </etc/dovecot/private/dovecot.key
ssl_cert = </etc/letsencrypt/live/mail.example.com/fullchain.pem
ssl_key = </etc/letsencrypt/live/mail.example.com/privkey.pem
-----
ssl_ca = </etc/letsencrypt/live/mail.example.com/chain.pem
-----
ssl_min_protocol = TLSv1
-----
# Refer - https://hynek.me/articles/hardening-your-web-servers-ssl-ciphers/
ssl_cipher_list = ECDH+AESGCM:ECDH+CHACHA20:DH+AESGCM:ECDH+AES256:DH+AES256:ECDH+AES128:DH+AES:RSA+AESGCM:RSA+AES:!aNULL:!MD5:!DSS:!AESCCM
-----
ssl_prefer_server_ciphers = yes
-----

# Save and exit the editor
LDA Configuration - Update the LDA configuration.
1
2
# LDA Configuration
sudo vim /etc/dovecot/conf.d/15-lda.conf
1
2
3
4
5
6
# Updates
-----
postmaster_address = postmaster@example.com
-----

# Save and exit the editor
Will continue to part-2……