[How To] Step By Step Installation Guide Linux Gentoo Live DVD 2016 With Screenshot - Part 2

Installation Gentoo Live DVD To HDD Part 1
In the article continued from part 1 guide to installation gentoo live dvd.
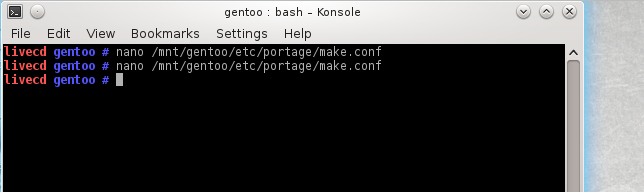
First check make.conf with following:
# nano /mnt/gentoo/etc/portage/make.conf
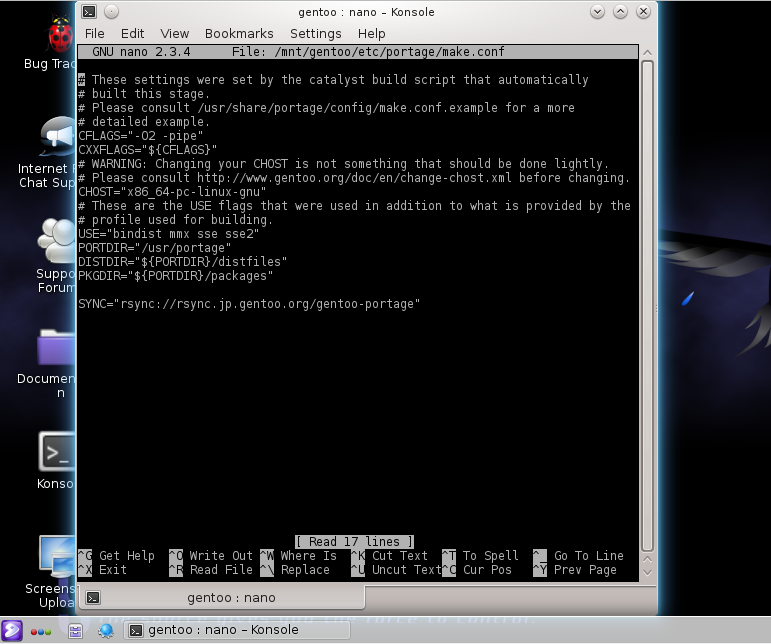
And then, see this configuration:
CFLAGS=”-O2 -pipe”
# Use the same settings for both variables
CXXFLAGS=”${CFLAGS}”
In my machine, this configuration was exist.

Next use mirrorselect you nearest fastest mirrors, and this i select to japan mirror in asia.


After select mirror, verify make.conf settings again and check mirror list, then copy dns from /etc/resolv.conf to your installation environment path. like image:

After copied from /etc/resolv.conf now mount this filesystem to /mnt/gentoo installation system path.
# mount -t proc /proc /mnt/gentoo/proc
# mount –rbind /sys /mnt/gentoo/sys
# mount –rbind /dev /mnt/gentoo/dev
The next step is to abort DVD live environment and enter our newly system installation path by using chroot, load previous system settings provided by /etc/profile file and change $PS1 Command Prompt.
# chroot /mnt/gentoo /bin/bash
# source /etc/profile
# export PS1=”(chroot) $PS1”
![]https://2.bp.blogspot.com/-me-qFk08YMQ/V0p2mrP1z-I/AAAAAAAADO8/0TBg33fErlsfZLaobs930DqoMH_RrHiQQCLcB/s1600/Screenshot_20160528_161003.png)

After that, Now download the latest Portage snapshot using emerge-webrsync command.


After Portage finishes synchronization select a profile for your future system destination. Depending on chosen profile the default values for USE and CFLAGS will change to appropriately reflect your system final environment (Gnome, KDE, Plasma, server etc.).
So i select to profile 9 using plasma and systemd.
# eselect profile list
# eselect profile set 9 ## For plasma

Next configure your system Time Zone and Locales by uncomment your preferred language from /etc/locale.gen file using the following series of commands.
# ls /usr/share/zoneinfo
# cp /usr/share/zoneinfo/Continent/City /etc/localtime
# echo “ Continent/City “ > /etc/timezone
Like this screenshot:

And edit /etc/locale.gen in here using nano editor:
# nano /etc/locale.gen
uncommment your system locale, like this screenshot:

And type this command for update configuration local-gen:
# locale-gen
# env-update && source /etc/profile

And now installig linux kernel with command:
# emerge gento-sources
# ls -l /usr/src/linux
Then compile your kernel using genkernel command, which automatically builds the kernel with the default hardware settings detected by DVD installer at boot time. Be aware that this process can take a lot of time depending on your hardware resources.
# emerge genkernel
# genkernel all


And if you got a problem like this screenshot, your type “etc-update” to your konsole, and if still same type this command:
# mkdir /etc/portage/repos.conf
# cp /usr/share/portage/config/repos.conf /etc/portage/repos.conf/gentoo.conf
now type above command again_“emerge genkernel”_ it should be work, but if not work you just ask to forums.gentoo.org


And if get the problem again try type command “emerge –sync”

Next config other system, configure fstab file to automatically mount system partitions during boot process. Open /etc/fstab file and add the following content:
# nano /etc/fstab
And then insert to lines:
/dev/sda2 /boot ext2 defaults,noatime 0 2
/dev/sda4 / ext4 noatime 0 1
/dev/sda3 none swap sw 0 0
Set a hostname for your system by editing /etc/conf.d/hostname file and /etc/hosts file similar to screenshots below and verify it using hostname command.
# hostname
for make sure:
# hostname -f
To configure you network settings permanently with DHCP install dhcpcd Client and add it to system start up process.
# emerge dhcpcd
# rc-update add dhcpcd default
On this stage you can also install SSH daemon, a System Logger and other useful tools.
# emerge virtual/ssh
# emerge syslog-ng
# emerge cronie
# emerge mlocate
# rc-update add sshd default
# rc-update add syslog-ng default
# rc-update add cronie default
If you want to customize system services, keyboard and hwclock settings, open and edit the following files according to your needs.
# nano -w /etc/rc.conf
# nano -w /etc/conf.d/keymaps
# nano -w /etc/conf.d/hwclock
Next provide a strong password for root account and add a new system user with root privileges.
# passwd
# useradd -m -G users,wheel,audio,lp,cdrom,portage,cron -s /bin/bash slacker’s
# passwd slacker’s
Install sudo with command:
# emerge sudo
Edit /etc/sudoers and uncomment %wheel group, like this:
# nano /etc/sudoers
uncomment (%wheel ALL=(ALL) ALL)
Install system bootloader, To make Gentoo start after reboot install GRUB2 Boot Loader on your first hard disk and generate its configuration file by running the following commands.
# emerge sys-boot/grub
# grub2-install /dev/sda
# grub2-mkconfig -o /boot/grub/grub.cfg
If you want to verify Boot Loader configuration file open /boot/grub/grub.cfg file and check menuentry contents.
After installing the last piece of software needed to boot the system, leave installation chrooted environment, unmount all mounted partitions, reboot your system and eject your DVD media installer.
# exit
# cd
# umount -l /mnt/gentoo/dev{/shm,/pts,}
# umount -l /mnt/gentoo{/boot,/proc,}
# reboot
After reboot the GRUB menu should appear on your system screen demanding to choose one of its two Gentoo Kernel booting options.
Select Gentoo from Grub Menu.
enter first boot, and then login to gentoo environment and remove stage3-*.bz.
And type again
# emerge –sync
Now you have gentoo linux in your HDD, may be useful and thanks!